Set up an Alert System with Amazon SNS
AWS SNS configuration steps
We will perform a quick test run to ensure your account is ready, and then complete the setup steps for Amazon SNS.
Step 1: Access the AWS Console
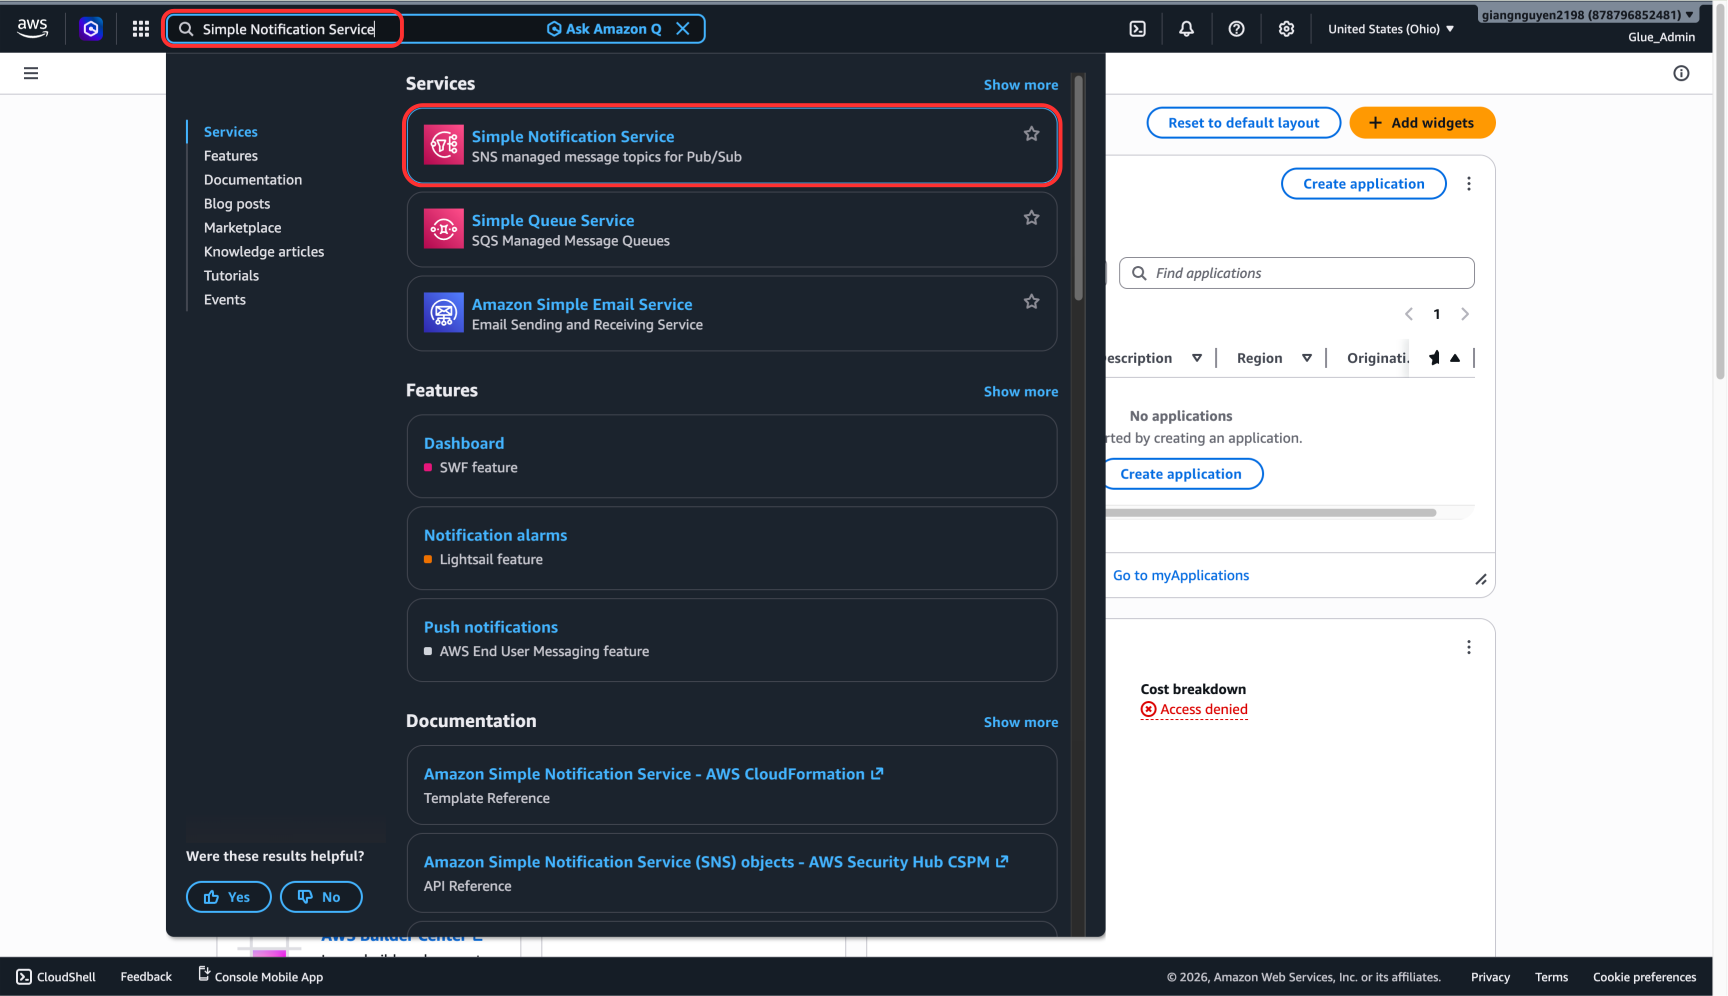
First, use the search bar to navigate to Amazon Simple Notification Service
Step 2: Open Topics
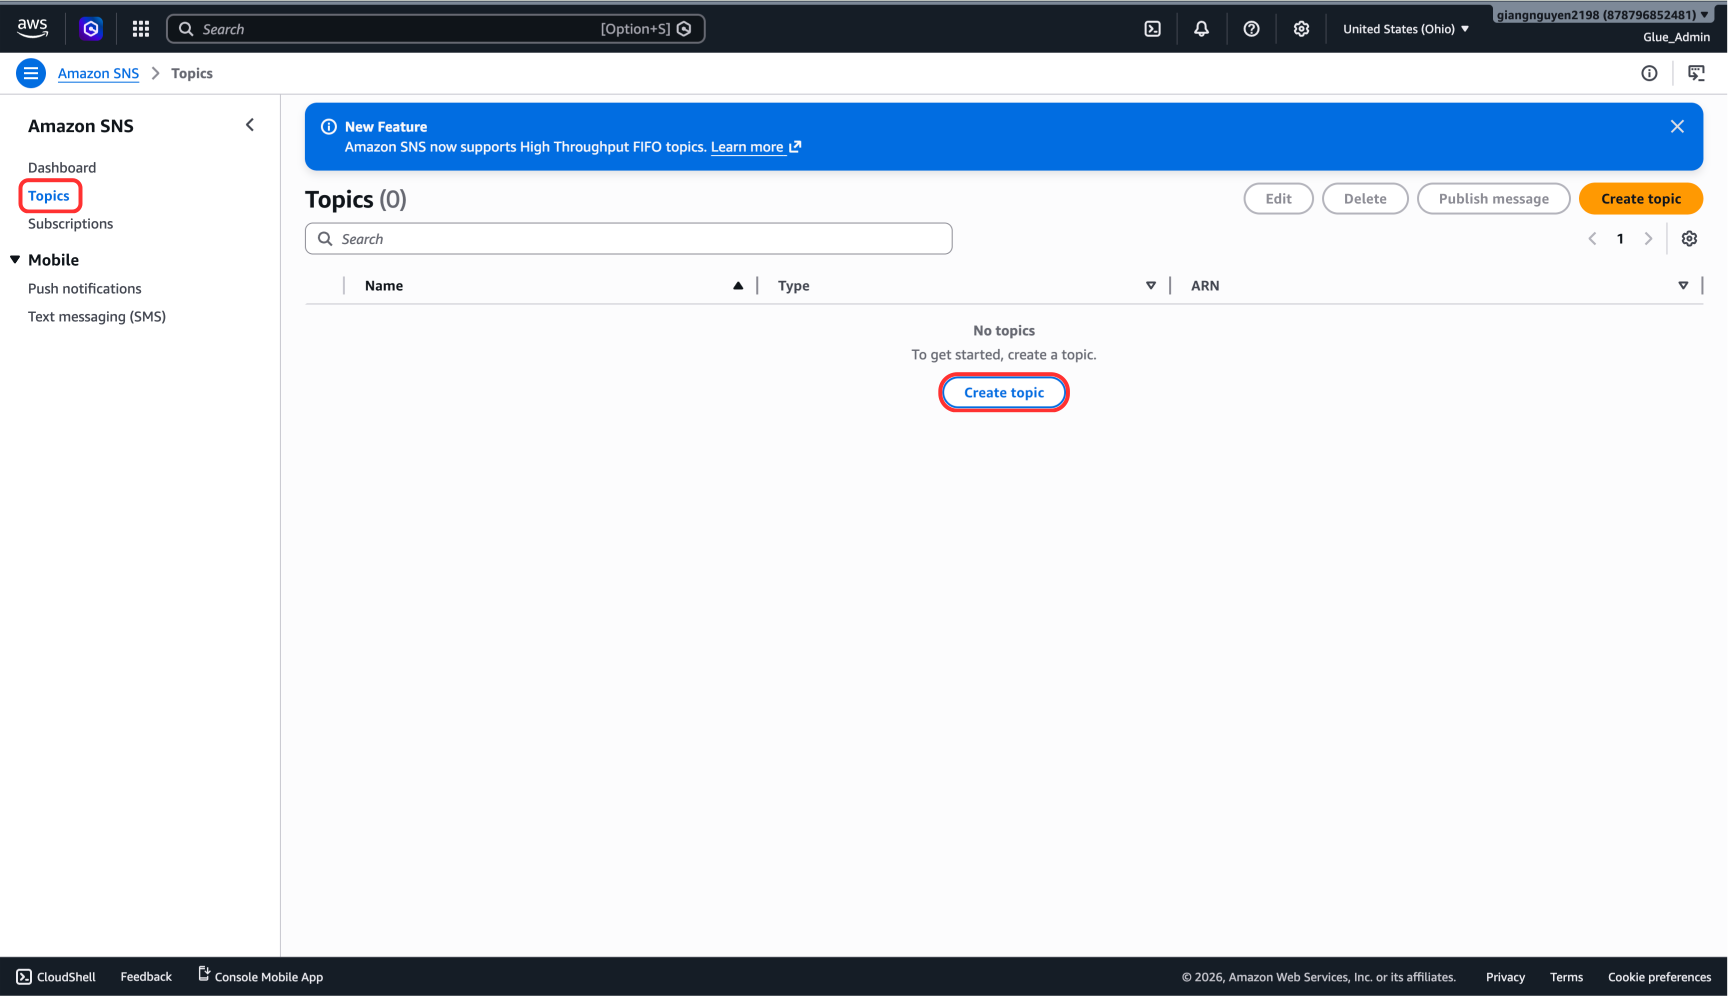
From the left menu, choose Topics -> Create topic
Step 3: Configure the Topic
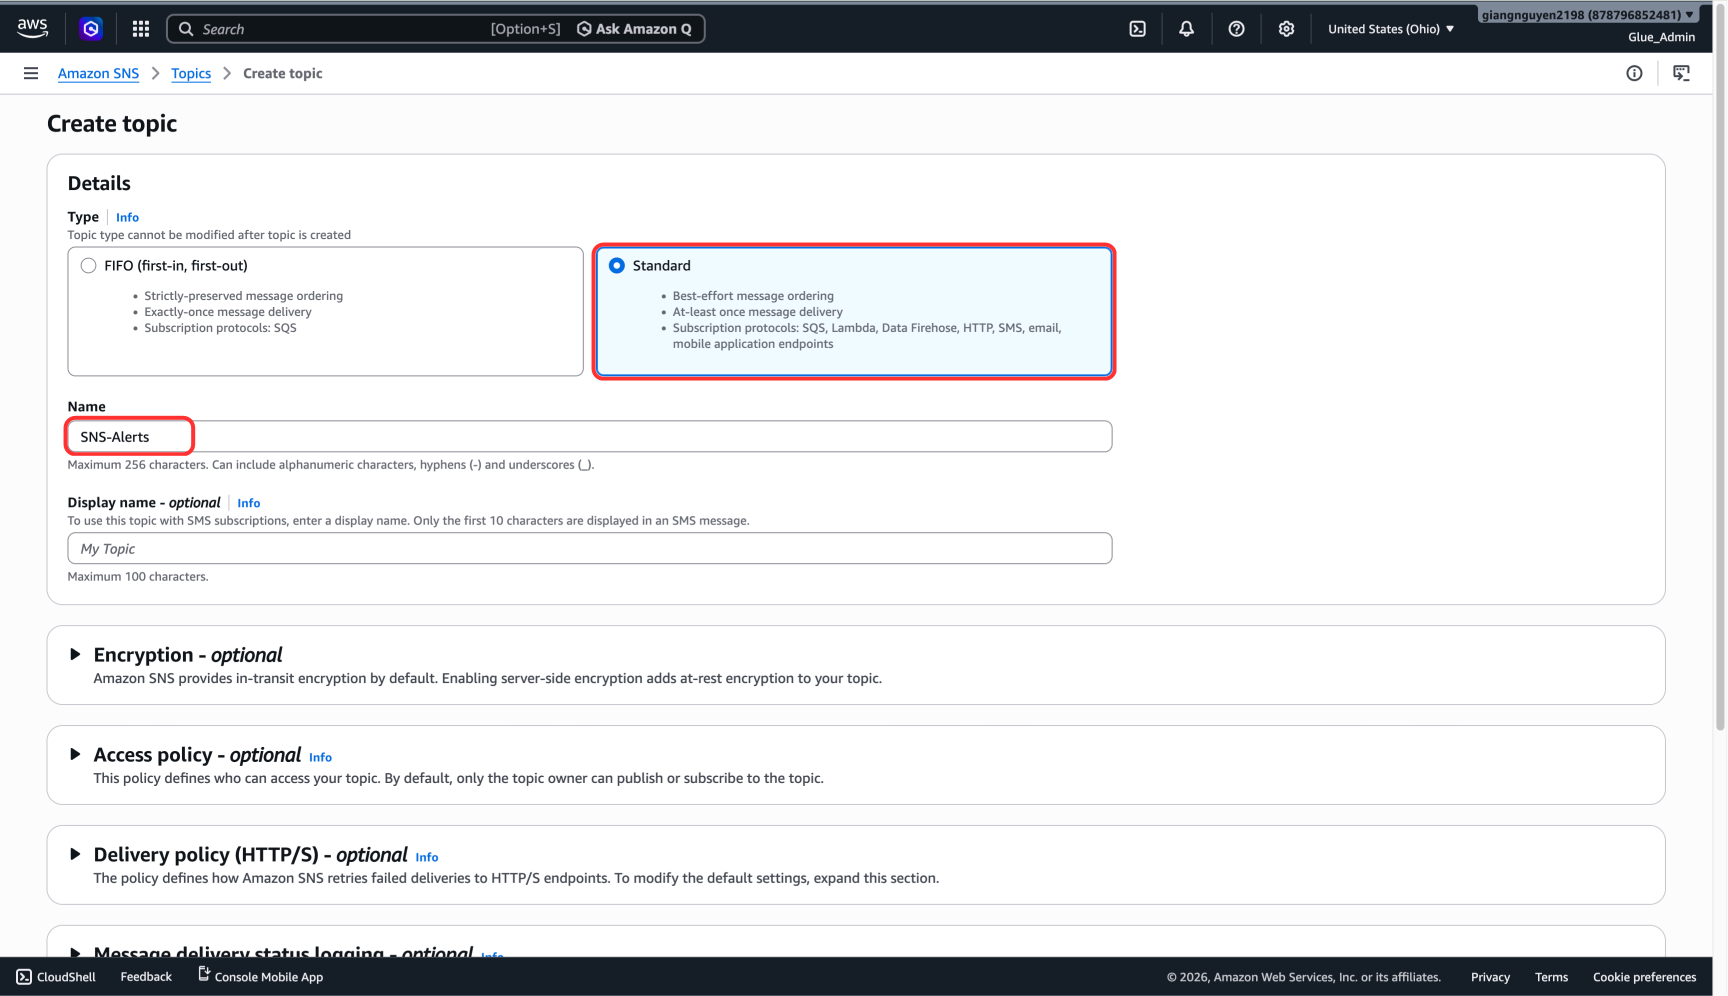
- Type: Choose Standard.
- Name:
SNS Alerts - Keep other settings as Default.
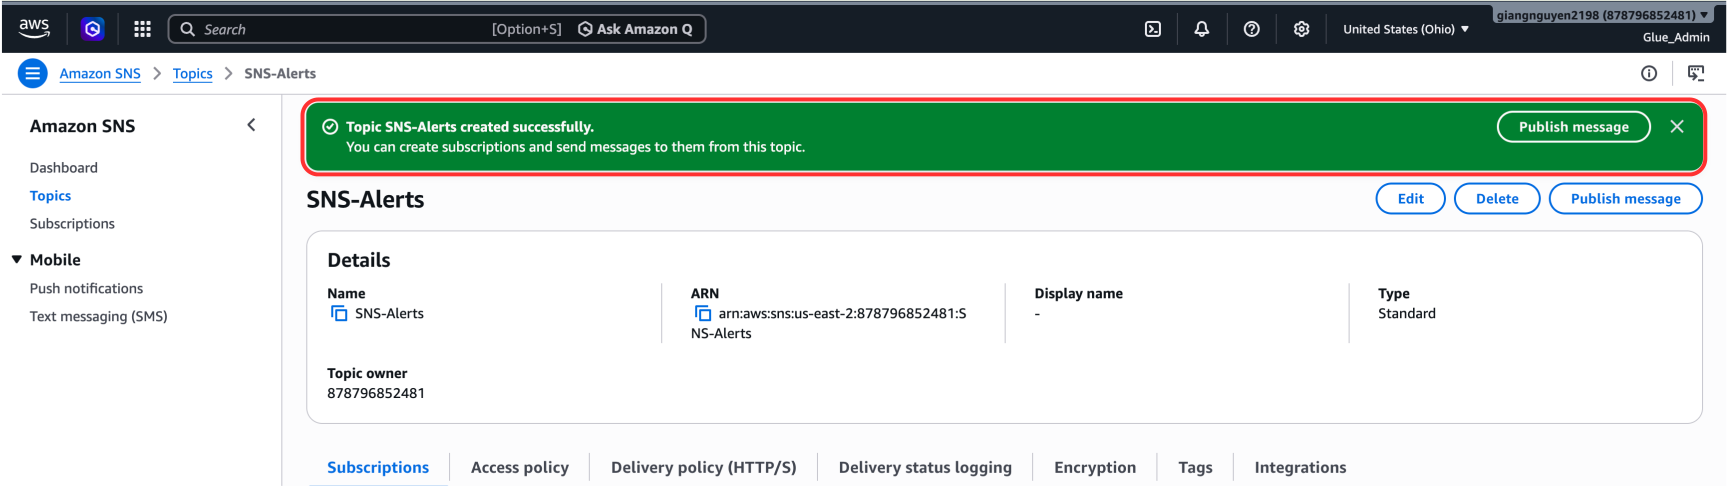
Scroll down and click Create topic.

Verify that the topic was created successfully.
Step 4: Open Subscriptions
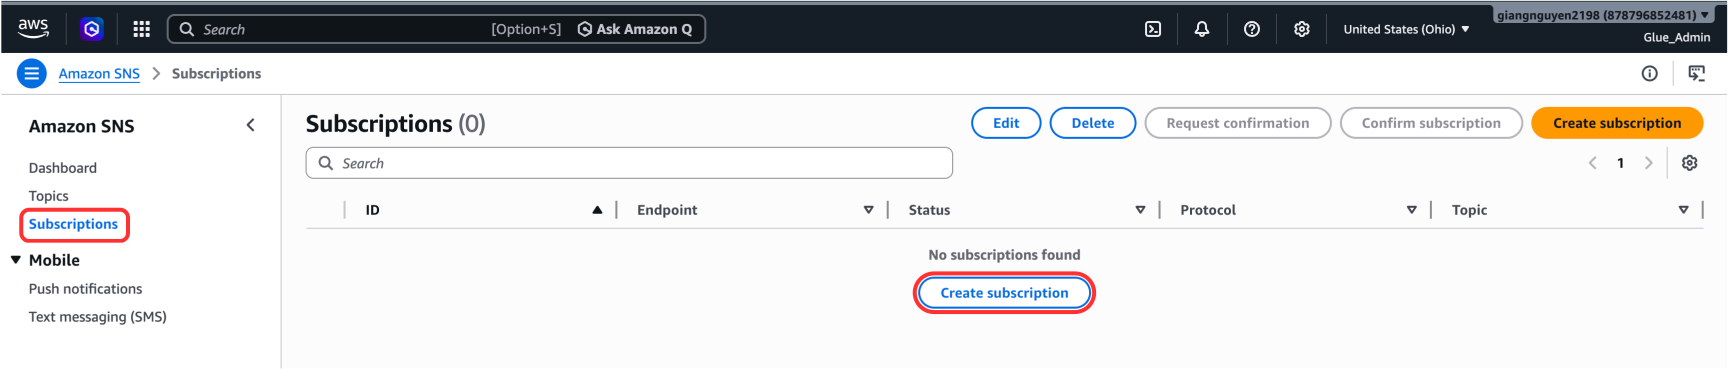
From the left menu, choose Subscriptions -> Create subscription
Step 5: Configure the Subscription
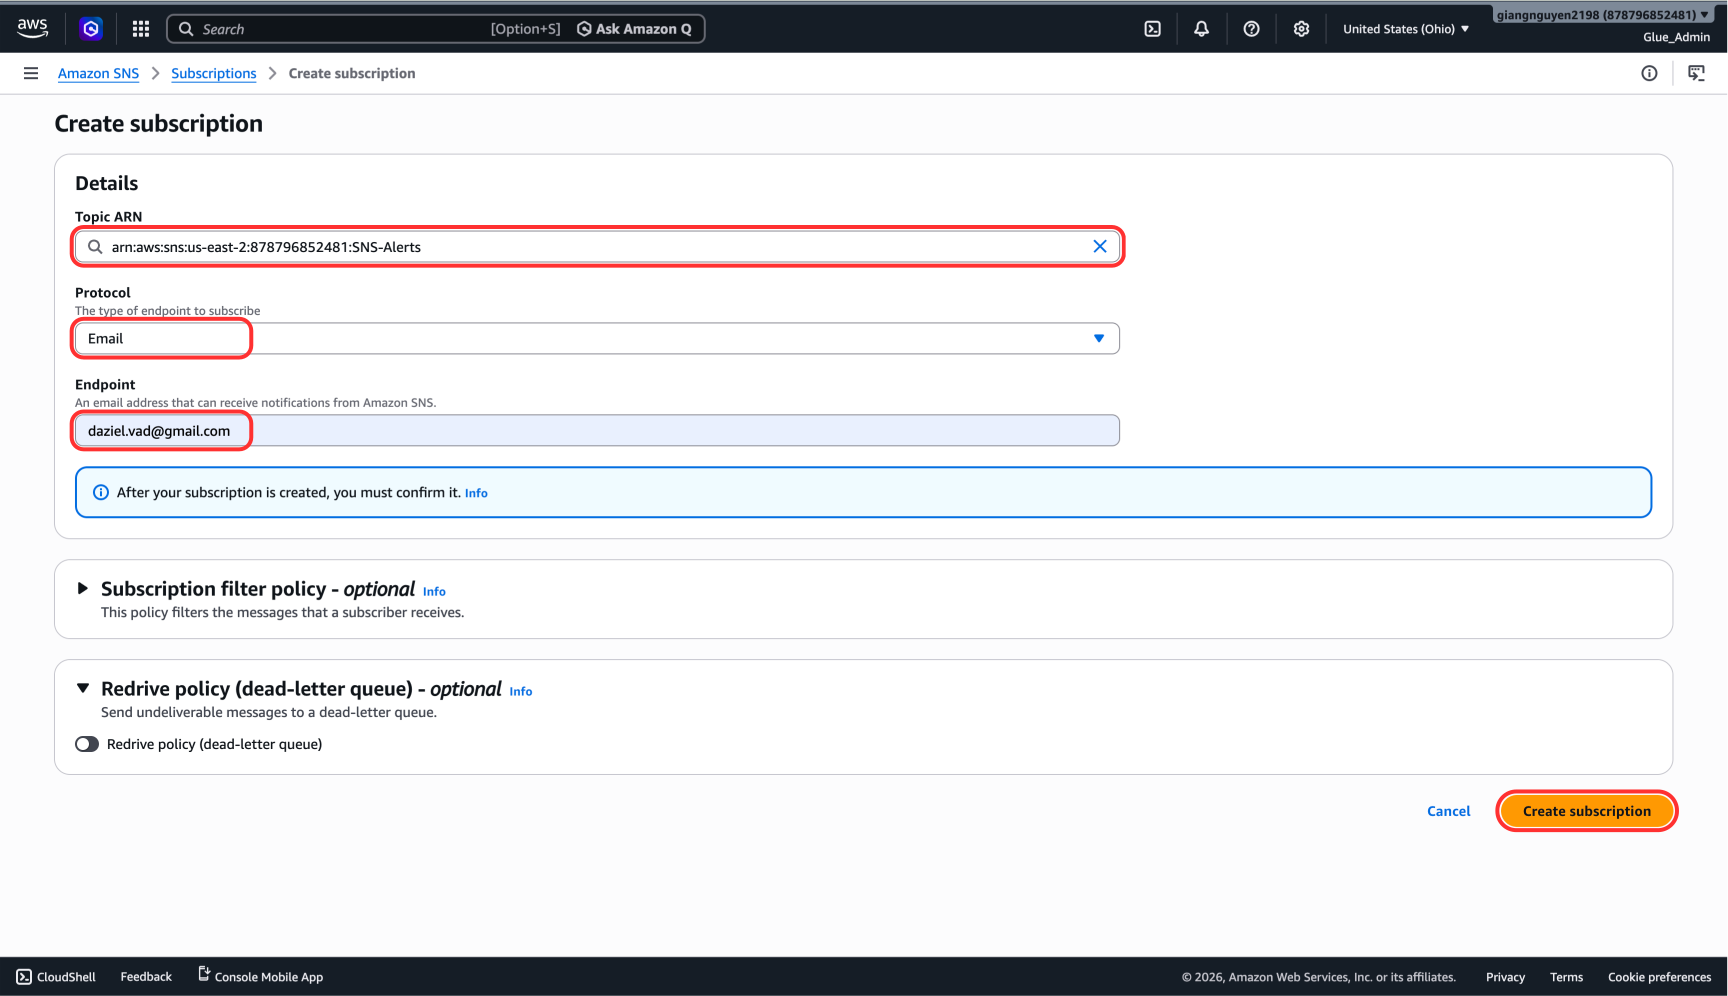
- Topic ARN: Select the
SNS Alertstopic you created earlier. - Protocol: Choose Email.
- Endpoint: Enter your email address.
- Click Create subscription.
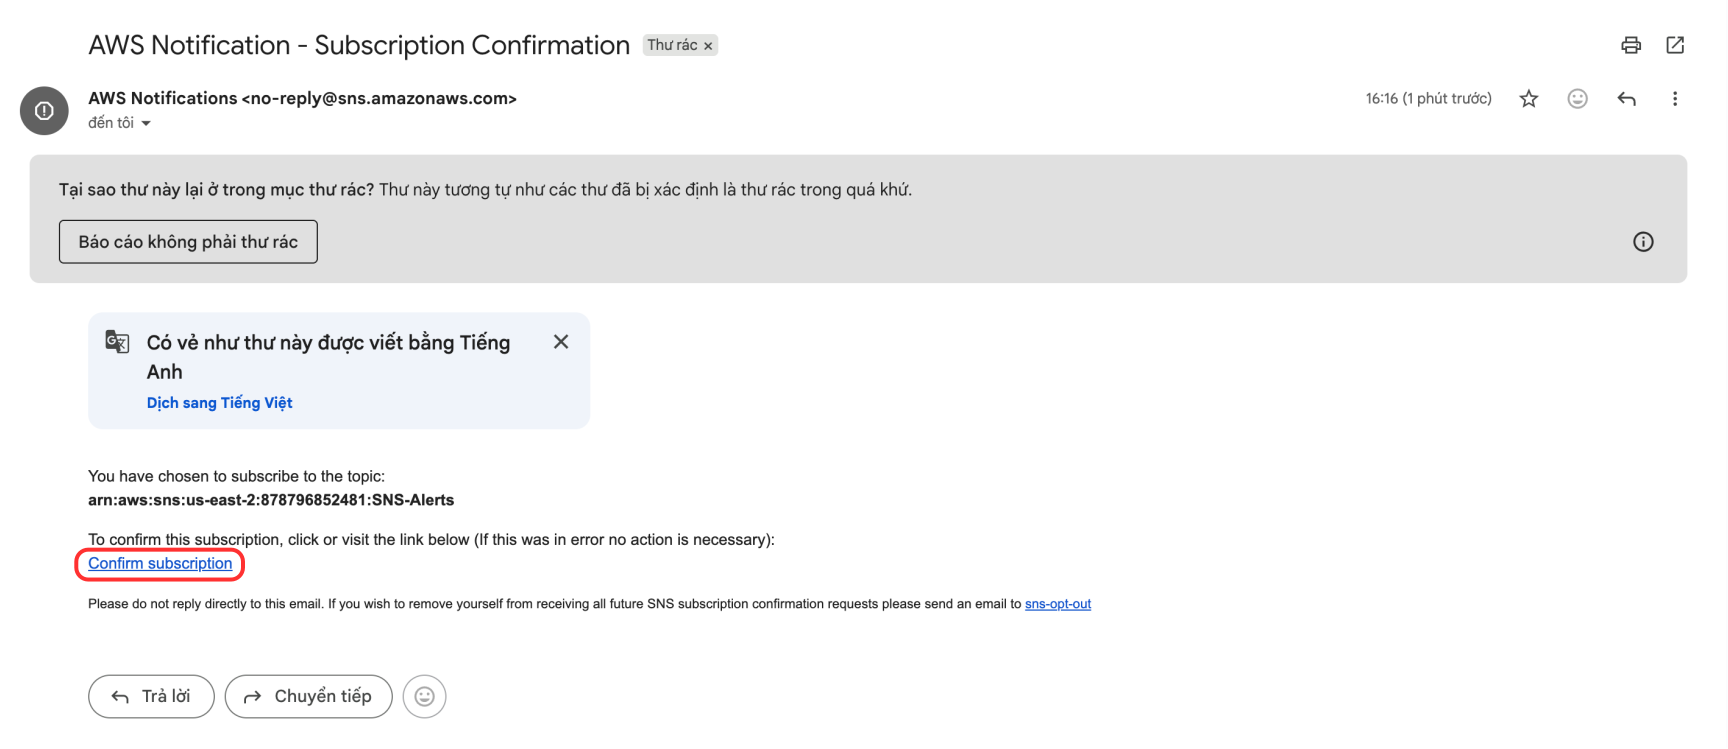
- Confirmation: Open your email inbox and find the message from AWS Notifications (it may be in the spam folder).
- Click Confirm subscription to activate the channel.
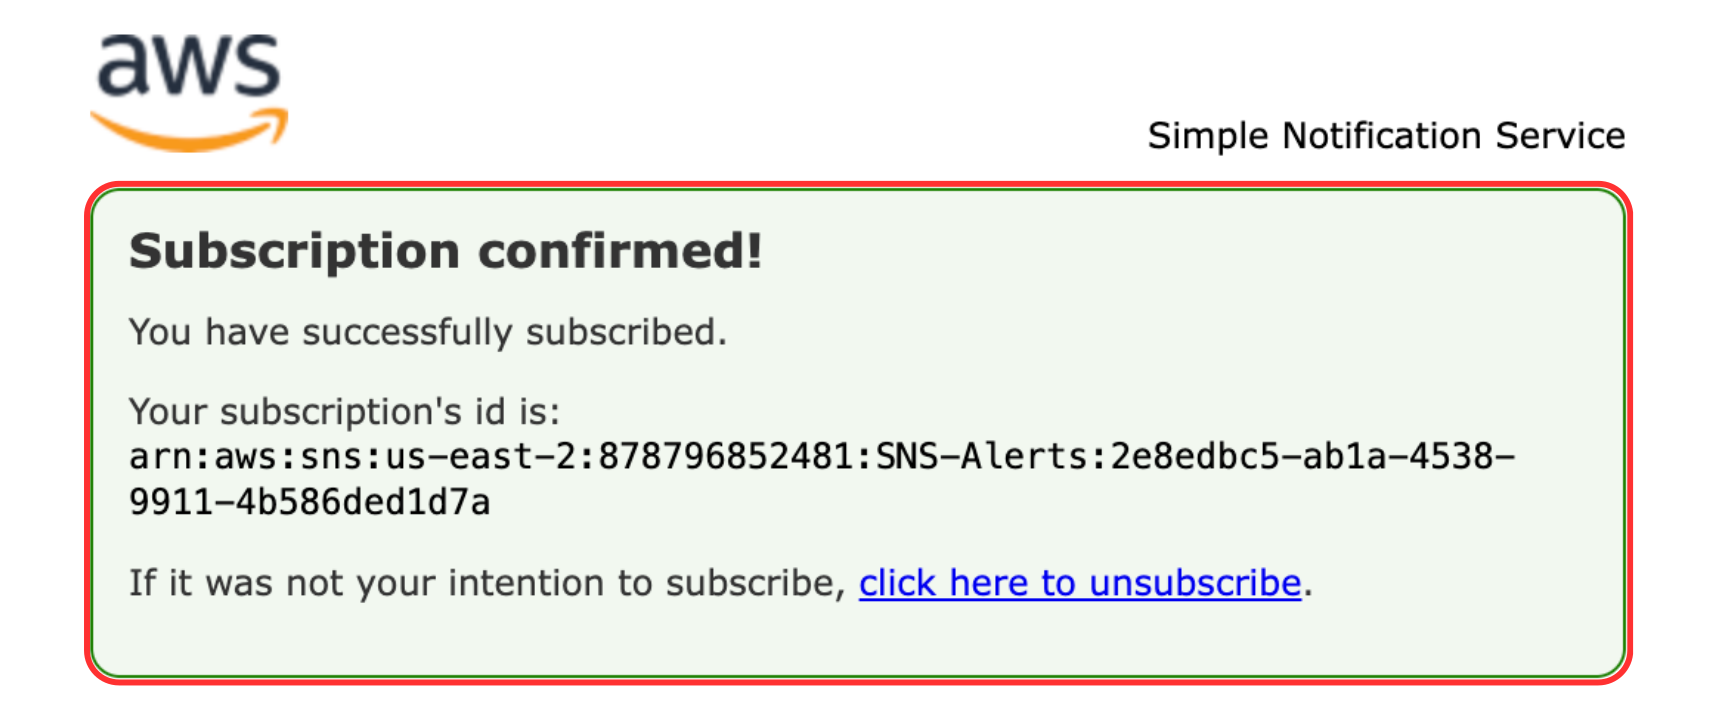
- You should receive a confirmation that the subscription is successful.
Step 6: Verify Subscription Status
Confirm that the subscription status shows Confirmed.
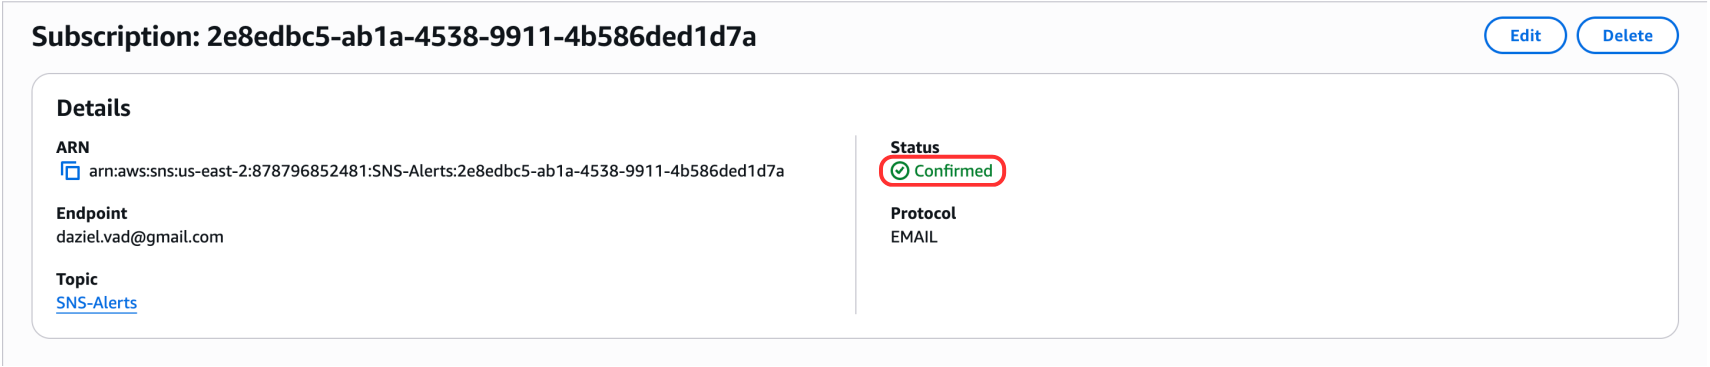
Congratulations — you have completed the AWS SNS configuration.